- Part 1. Why All My Apple Music Is Gone?
- Part 2. How to Fix All My Apple Music Is Gone?
- Part 3. How to Backup Apple Music So You Never Lose Them
Part 1. Why All My Apple Music Is Gone?
When Apple Music content disappears, it is rarely permanent. Missing music can be caused by account, settings, or device issues, and sometimes by temporary server problems. Understanding the common reasons helps you choose the right recovery steps so you can get your music back quickly and safely.
- Apple Music subscription expired or was canceled.
- Signed in with a different Apple ID than the one used to purchase or subscribe.
- Show Apple Music setting is turned off on the device.
- Sync Library or iCloud Music Library is turned off or out of sync.
- Playlists or the Playlists view is hidden in the Music app.
- Device storage is full or corrupted files prevent the Music app from showing content.
- Recent iOS, macOS, or iTunes update introduced a temporary bug.
- Apple ID or Family Sharing settings changed or restricted access.
- Regional changes or content licensing removed some tracks in your region.
- App cache, temporary files, or junk data causing UI glitches.
- You were signed out of Apple Music or the device lost the authorization to access your library.
- Temporary Apple Music server outage or downtime.
- DRM-related playback/authorization problem for some tracks.
- Accidental deletion or library sync conflict between devices.
Part 2. How to Fix All My Apple Music Is Gone?
Start with the simplest checks, then move to syncing and library options. Most disappearances are fixed by confirming your subscription, toggling the proper settings, or refreshing the iCloud Music Library. Work through these methods one by one; many users restore their full library before needing advanced steps.
Method 1. Check Your Apple Music Subscription
If your subscription ended or the device is not signed in to the correct Apple ID, your Apple Music content may be hidden. Confirming subscription status and Apple ID is the first step.
1. Open Settings on your iPhone or iPad.
2. Tap your name at the top to open Apple ID settings.
3. Tap Subscriptions and find Apple Music.
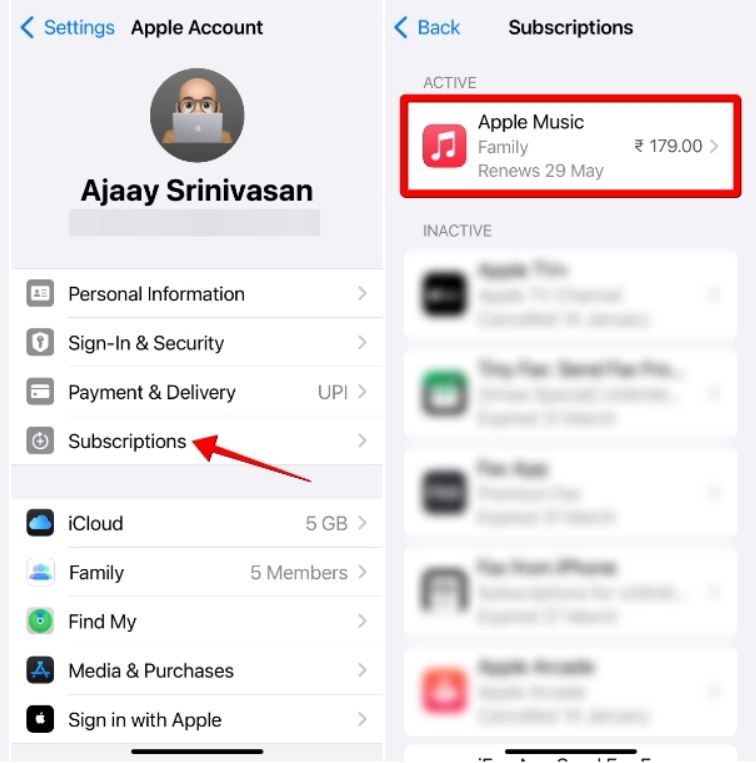
4. Verify the subscription is active and the correct plan is listed. If expired, renew or re-subscribe.
5. If subscription is active but content is missing, sign out of your Apple ID and sign back in: Settings > your name > Sign Out. Then sign in again and check the Music app.
6. Make sure you are signed into the same Apple ID on all devices where you expect to see your library.
Method 2. Make Sure Show Apple Music is Turned On
If the Show Apple Music setting is disabled, the app will hide Apple Music catalog and some library features. Toggling this setting often restores visibility.
1. Go to Settings.
2. Choose Music.
3. Make sure Show Apple Music is turned on.
4. If it is already on, toggle it off and then turn it on again.
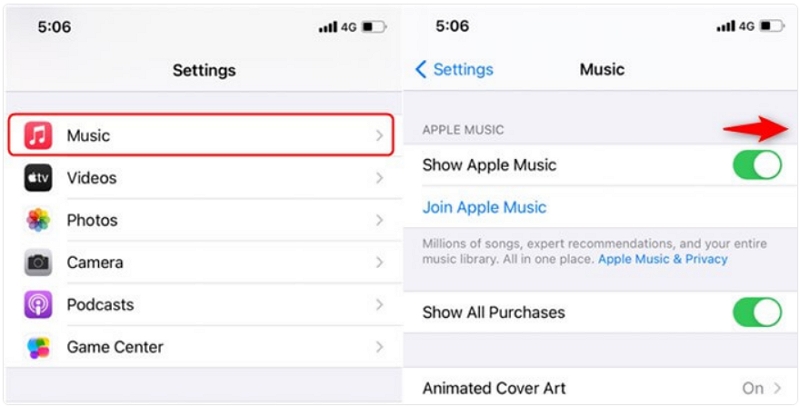
5. Reopen the Apple Music app and check your Library and Playlists.
Method 3. Turn on iCloud Music Library (Sync Library)
Sync Library (also known as iCloud Music Library) keeps your songs and playlists consistent across devices. If this is off, your device may not show content uploaded or saved on other devices.
Steps for iPhone and iPad:
1. Open Settings.
2. Scroll to Music.
3. Turn on Sync Library. Note: Sync Library requires an active Apple Music or iTunes Match subscription.
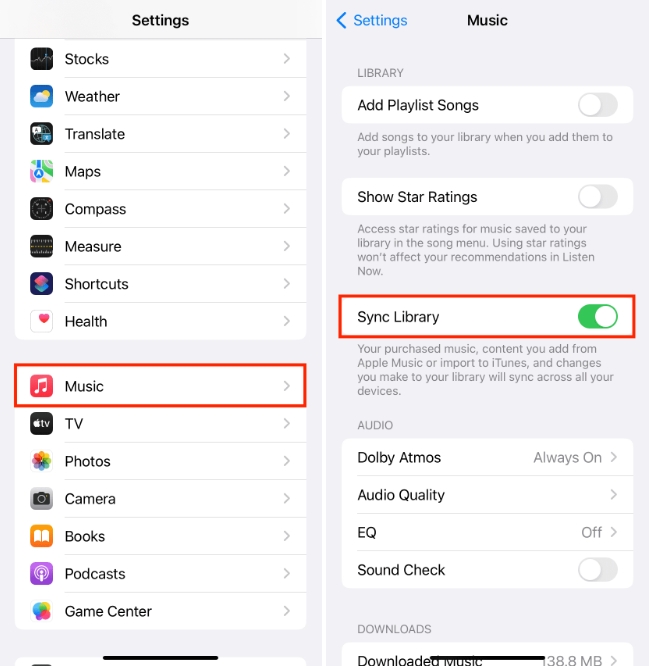
4. Wait a few minutes for the library to re-sync, then open the Music app.
Steps for Mac:
1. Open the Music app.
2. From the menu bar pick Music > Preferences.
3. Under General, check Sync Library.
4. Click OK and allow time for syncing.
Steps for Windows (iTunes):
1. Open iTunes and sign in with your Apple ID.
2. From the menu choose Edit > Preferences.
3. Under General, check iCloud Music Library or Sync Library if available.
4. Click OK and let iTunes update the library.
Method 4. Turn on "Apple Music Playlist"
If the Playlists view is disabled in the Music app, playlists may be hidden even though they still exist in your account. Re-enabling the Playlists option will restore visibility.
1. Launch the Apple Music app on your mobile device.
2. Navigate to Library and tap Edit.
3. If you observe that the Playlists option is deactivated, activate it.
4. Return to Library and check Playlists to see if your playlists reappear.
Method 5. Delete the Junk Files
Low free space or corrupted temporary files can prevent the Music app from displaying your library correctly. Cleaning up storage and removing junk can resolve the issue.
1. Go to Settings > General > iPhone Storage.
2. Review large apps, media, and temporary files. Tap apps you no longer need, then select Delete App or offload the app to keep documents and data.
3. Clear Safari cache: Settings > Safari > Clear History and Website Data.
4. Restart your device after freeing space and reopen the Music app.
Solution 6: Update iCloud Music Library with iTunes
If your library did not sync correctly, forcing an update from iTunes or the Music app can push the missing entries back to iCloud and to your devices.
1. On a Mac, open the Music app. On Windows, open iTunes and sign in with the same Apple ID used for Apple Music.
2. In the Music app or iTunes, go to the File menu.
3. Choose Library and then Update iCloud Music Library or Update iCloud Music Library equivalent.
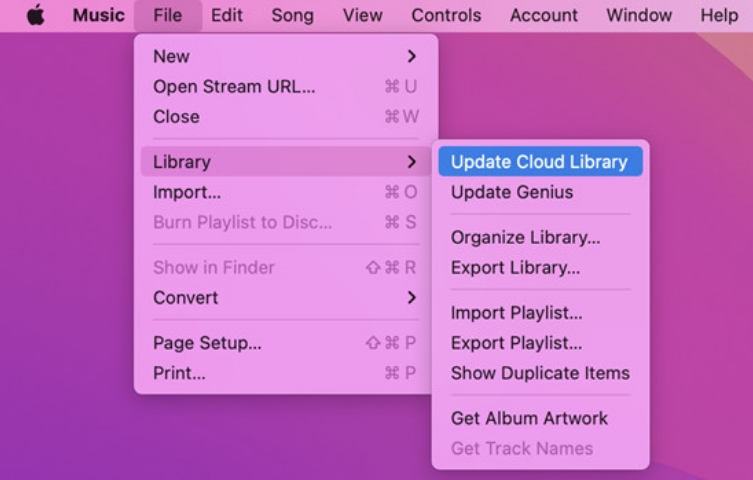
4. Wait for the update to complete.
5. On your other devices, open the Music app and allow a few minutes for Sync Library to refresh.
Part 3. How to Backup Apple Music So You Never Lose Them
Relying solely on cloud sync leaves room for accidental loss or temporary outages. A local backup gives you lasting control over your purchased or streamed music, playlists, album metadata, and artwork. TuneMobie Apple Music Converter is a tool designed to export Apple Music tracks and playlists to common formats so you maintain offline copies that remain playable even without Apple Music. Backing up your library protects you from accidental deletions, subscription issues, and sync conflicts.

- Convert Apple Music tracks to common formats such as MP3 and FLAC.
- Preserve playlist structure during conversion so playlists remain organized.
- Keep album metadata such as title, artist, album, track number, and genre.
- Download and embed album artwork into converted files.
- Batch convert albums and playlists to save time on large libraries.
- High quality output with adjustable bitrate options up to 320 kbps or lossless FLAC.
- Built-in Apple Music web player for signed-in access to your library and playlists.
- Support for keeping ID3 tags so converted files remain searchable and portable.
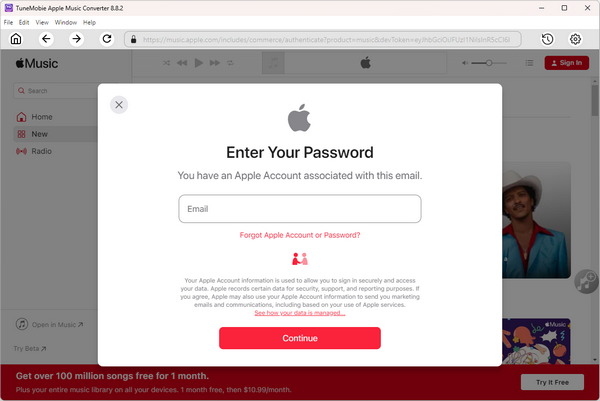
Step 1: Open TuneMobie Apple Music Converter. Use the built-in Apple Music web player and click Sign In (upper right). After sign-in, your Apple Music library and playlists appear in the left panel.
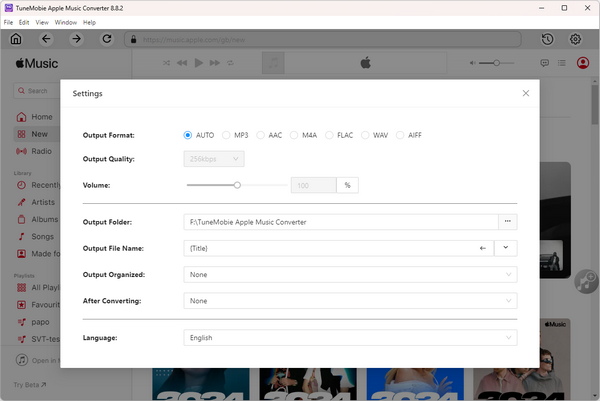
Step 2: Open Settings, select FLAC and choose bitrate (up to 320 kbps). Set output folder, rename and sorting rules, and any post-conversion action (for example, open folder).
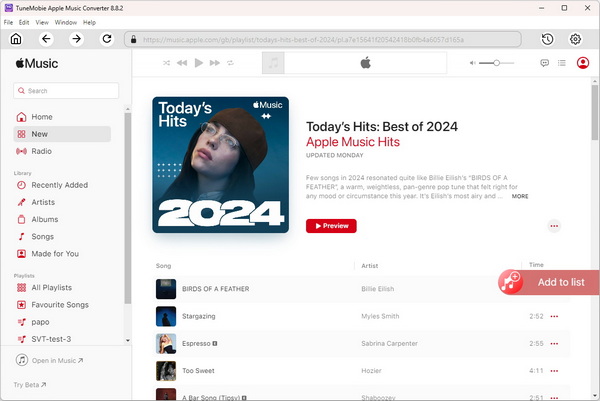
Step 3: Browse the built-in player to an album or playlist and open its detail page to list tracks. Click Add to list to queue all songs. Alternatively select individual tracks.
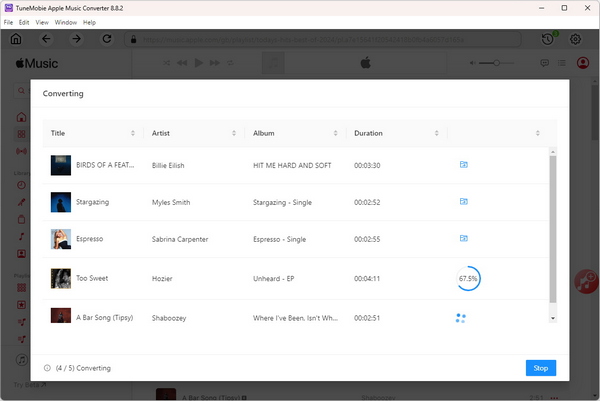
Step 4: Tracks are checked by default. Uncheck any you do not want. Click Convert. TuneMobie captures the audio stream and ID3 metadata and creates MP3 or FLAC files in the chosen folder.
Now, you can transfer converted songs to any device, upload them to Google Drive, burn them to CDs, or listen offline without worrying about subscription limits.
Conclusion
Losing your Apple Music library is alarming, but most cases are resolved by checking your subscription, confirming account settings, and re-enabling Sync Library or Show Apple Music. Clean up storage, toggle the Playlists option, and update your iCloud Music Library if necessary. For long-term safety, back up your Apple Music collection with a reliable tool such as TuneMobie Apple Music Converter so you keep local copies of tracks, playlists, artwork, and metadata. Follow the steps above and you should be able to restore your music and protect it from future loss.