- Part 1: What Is VivaVideo: Key Features and Best Use cases
- Part 2: Part 2. Can You Use Apple Music in VivaVideo?
- Part 3. How to Convert and Add Apple Music to Vivavideo?
Part 1: What Is VivaVideo: Key Features and Best Use cases
![]()
VivaVideo is a popular mobile video editing app for iOS and Android. It offers themes, filters, transitions, music, and advanced editing tools, making it easy to create professional-quality videos and slideshows.
Key Features of VivaVideo:
- Easy Editing Modes: Edit videos or create slideshows with just a few taps.
- Themes & Templates: Apply ready-made themes to give videos a polished look.
- Music Integration: Add MP3 tracks, built-in sound effects, or voice recordings.
- Clip Editing Tools: Trim, split, merge, adjust speed, rotate, reverse, and more.
- Text & FX Options: Add text, stickers, filters, speech-to-text, and mosaic effects.
- Filters & Effects: Enhance visuals with customizable filters and effects.
- Export Options: Save and share videos in various resolutions (up to 4K with VIP).

Best Use Cases of VivaVideo
- Social Media Content: Create TikTok, Instagram Reels, and YouTube shorts.
- Vlogs & Personal Stories: Edit travel, lifestyle, or daily vlogs on the go.
- Photo Slideshows: Turn photo collections into engaging slideshow videos.
- Educational Content: Add captions, voiceovers, and effects for tutorials.
- Business Promotions: Produce promotional clips and product demos quickly.
Part 2. Can You Use Apple Music in VivaVideo?
Many users want to use their favorite Apple Music songs as background music in VivaVideo. However, VivaVideo only supports MP3 format for background tracks. Since Apple Music songs are DRM-protected, they cannot be imported directly.
The solution is to use an Apple Music Converter to convert tracks to MP3 or M4A. Once converted, you can easily add your favorite Apple Music songs to your VivaVideo projects.
Part 3. How to Convert and Add Apple Music to Vivavideo?
TuneMobie Apple Music Converter is the dedicated solution to add Apple Music songs to Vivavideo as background music because it can effortlessly convert Apple Music songs to MP3 format. Besides, TuneMobie Apple Music Converter also comes with many other wonderful features as below.
- Convert Apple Music songs, albums and playlists to MP3 which can be used in Vivavideo
- Convert Apple Music for VivaVideo with a built-in web player without using iTunes or Music app
- If necessary, you can also convert Apple Music songs to M4A, WAV, AIFF, FLAC, etc.
- Keep music information including title, album, artist, track number and artwork
- Rename output files in bulk by title, album, artist, track number, hyphen, space, etc.
- Sort output files into folders by album, artist, artist/album or album/artist.
- Losslessly convert 256kbps Apple Music AAC file to 320kbps MP3 or 256kbps M4A
- Enjoy incredible 20X faster conversion speed on both Windows and macOS
- Fully compatible with latest Windows and macOS (Intel & Apple silicon)
Steps to Add Your Favorite Apple Music Songs to VivaVideo as Background Music
TuneMobie Apple Music Converter is very easy-to-use and intuitive with a built-in Apple Music web player and 20X faster conversion speed. Follow the steps below and you can easily add your favorite Apple Music songs to VivaVideo as background music.
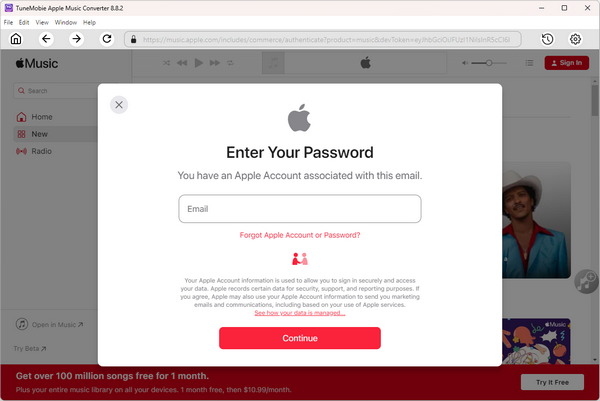
Step 1: Launch TuneMobie Apple Music Converter and Sign in
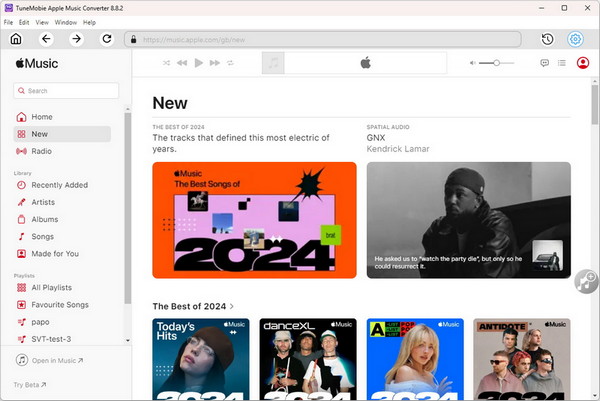
Launch TuneMobie Apple Music Converter and you will see a built-in Apple Music web player. Click "Sign In" button at the upper right to sign in the Apple Music web player. You don't need to enter Apple ID and password next time if you don't sign out. After signing in, all Apple Music playlists in your library will be displayed in the left panel.
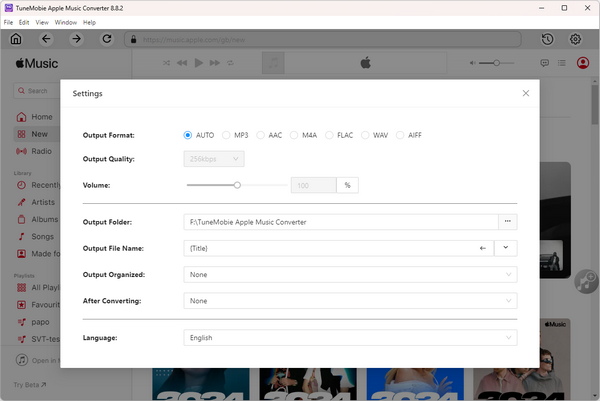
Step 2: Choose MP3 Output Format
The default output format is AUTO option (256kbps M4A) which is not compatible with VivaVideo. To change the output format to MP3 for VivaVideo, you need to click Settings icon at the upper right to open Settings dialog, then change output format to MP3. If necessary, you can also change output folder, the way of renaming and sorting output files, action after conversion, etc.
Step 3: Open Apple Music Album/Playlist
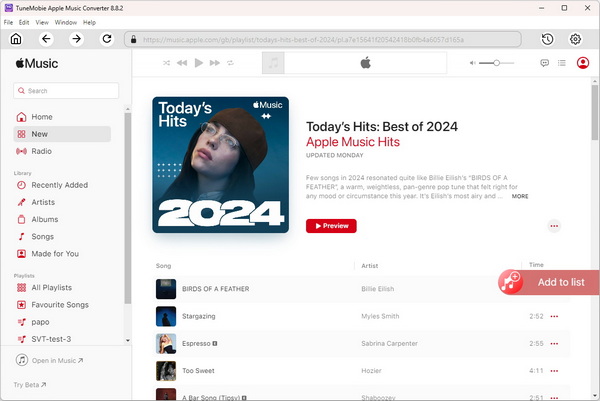
Go back to the built-in Apple Music web player and browse your favorite album or playlist, then open the detailed page of an album or a playlist and song list will be displayed.
Step 4: Add Album/Playlist to Conversion List
You can easily find a button in the center right, move your mouse to the button and it will be changed to "Add to list" button. Click "Add to list" button to add all the songs in the album/playlist to conversion list.
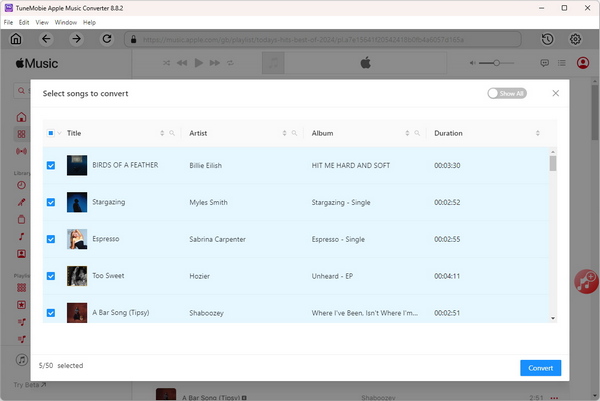
Step 5: Choose the Songs
All the songs will be checked by default. If you don't want to convert some of the songs, you can simply uncheck them.
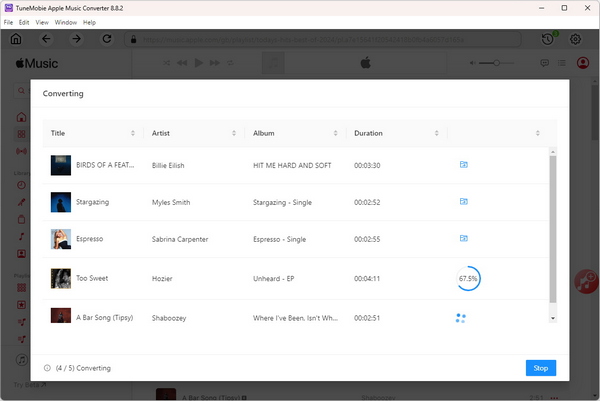
Step 6: Start Apple Music Conversion
Now simply click the Convert button to start converting Apple Music songs to MP3 format which can be added to VivaVideo.
Step 7: Transfer Output Music to Mobile Device
The way of transferring output music to device is different on iOS and Android.
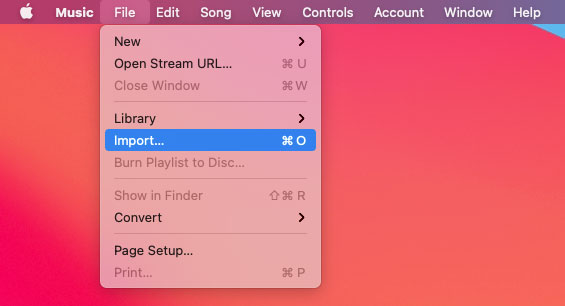
For iPhone and iPad, you need to add output songs to music library first. If you are using iTunes on Windows or macOS 10.9 - 10.14.6, please launch iTunes alone, click menu "File" > "Add File to iTunes Library" and add the MP3 output songs to iTunes library. If you are using Music app on macOS 10.15 or later, please launch Music app alone, click menu "File" > "Import" to add output MP3 files to music library.
Then create a playlist and add the songs, connect your iPhone/iPad to your computer with USB cable and synchronize the playlist to it.
For Android, connect your device to computer with USB cable first. On your phone, tap the "Charging this device via USB" notification, Under "Use USB for," select "File Transfer". Then choose copy the output songs from output folder and paste to Music folder in Android.
Step 8: Choose Music as BGM in VivaVideo
After you copied the converted Apple Music songs to your device, you can choose them as background music in your video or slideshow project. Open a project, in the "Music" tab, tap "Music" button or "Add music" bar under the videos or photos, and you will see "Featured" and "Your Music". The converted Apple Music songs you have transferred to your device will be listed here. Tap on a song, you can trim it if necessary. Now tap "Use" button to set it as background music of your video editing project.
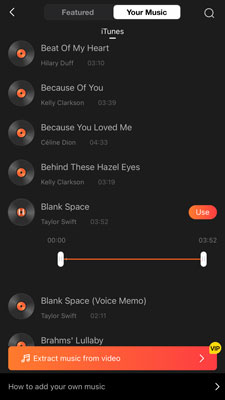
Actually, you can add your own MP3 files to VivaVideo in several ways. at the bottom of "Your Music" tab, you can also see "How to add your own music", then three ways including iTunes synchronization, SNS sharing and airdrop will be provided. As to adding Apple Music to VivaVideo, no matter which way you use, you need to convert the Apple Music songs to MP3 files with Apple Music Converter on your computer first.
Bottom line
If fact, Apple Music Converter is versatile for all kinds of video editing apps on iOS and Android, as well as for video editing programs on Windows and Mac. What you need to do is to convert Apple Music to compatible audio format first.
If you are using VivaVideo and Apple Music on same device, and want to use Apple Music songs as Background music in your video or slideshow, do not hesitate to download Apple Music Converter to have a try!