- Part 1: How to cancel Apple Music subscription on Windows, Mac, iOS, Apple TV and Android?
- Part 2: What Happens after Canceling Apple Music?
- Part 3: How to Keep Your Playlists After You Cancel Apple Music?
Part 1. How to cancel Apple Music subscription on Windows, Mac, iOS, Apple TV and Android?
Before you cancel, be sure which Apple ID and which platform billed you. Subscriptions purchased through Apple are managed in Settings or the App Store. If you subscribed through Google Play on Android, you cancel via Google Play. Below are the device specific instructions so you can stop the renewal quickly and safely.
1. Cancel Apple Music Membership on Windows
On Windows PC you may have used the iTunes to subscribe. Canceling from the computer is handy when you prefer a larger screen or do not have your phone at hand.
1. Open iTunes, you surely know how to do it.
2. From the menu bar at the top of your computer screen or the top of the iTunes window, choose Account > View My Account. You might be asked to sign in.
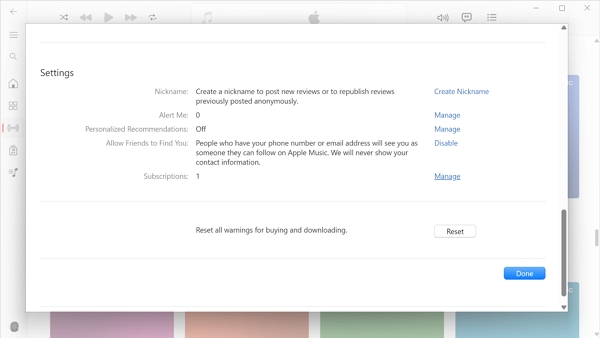
3. On the Account Information page, scroll to the Settings section.
4. To the right of Subscriptions, click Manage, then click Apple Music Membership.
5. Click Cancel Subscription. After you cancel, your subscription will stop at the end of the current billing cycle.
2. Cancel Apple Music Subscription on Mac
On Mac, you can use the Music app to cancel Apple Music subscription
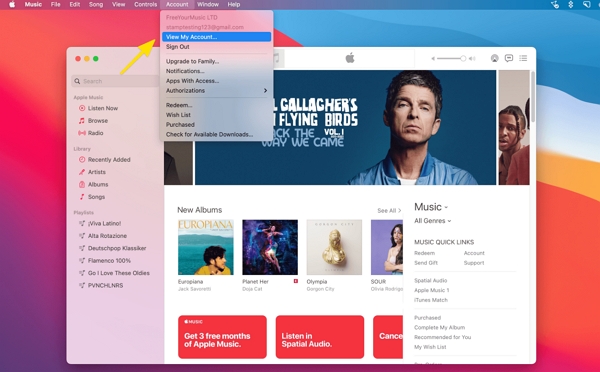
1. Open the Music app on your Mac.
2. From the menu bar choose Account, then View My Account if prompted sign in with your Apple ID.
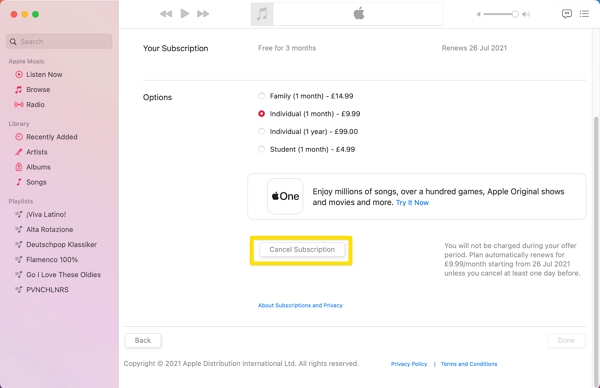
3. Scroll to Subscriptions and click Manage.
4. Find Apple Music and click Edit, then choose Cancel Subscription and confirm.
5. Click Cancel Subscription. After you cancel, your subscription will stop at the end of the current billing cycle.
3. Cancel Apple Music Membership on iOS Devices (iPhone, iPad or iPod Touch)
If you subscribed on an iPhone or iPad, the simplest method is to use the Settings app to access your Apple ID subscriptions.
1. Open the Music app, then tap For You.
2. Tap the profile icon or your photo at the upper-right corner, then tap View Apple ID. You might be asked to sign in or use Touch ID.
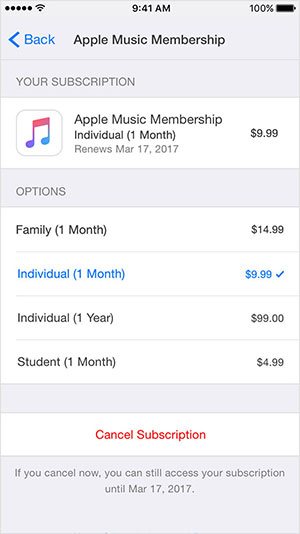
3. Tap Subscriptions, then tap Apple Music Membership.
4. Tap Cancel Subscription. After you cancel, your subscription will stop at the end of the current billing cycle.
4. Cancel Apple Music Membership on Apple TV
Apple TV has a dedicated subscriptions area in Settings so you can cancel without another device. This is useful if the subscription is billed through your Apple TV account.
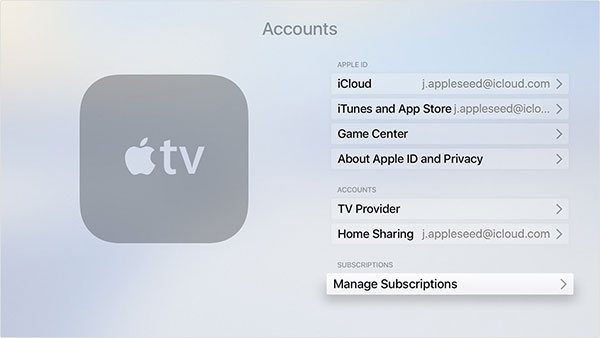
1. Open Settings, then select Accounts.
2. Under Subscriptions, select Manage Subscriptions. You might be asked to sign in.
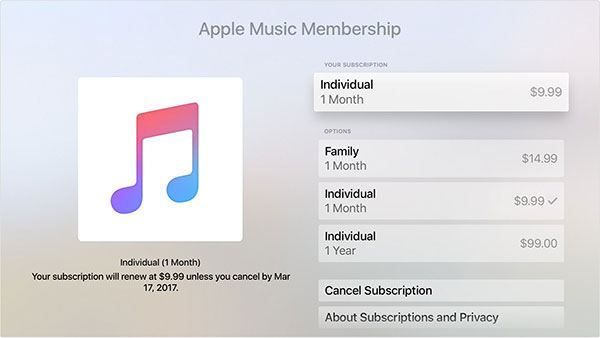
3. Choose Apple Music Membership, then select Cancel Subscription. After you cancel, your subscription will stop at the end of the current billing cycle.
5. Cancel Apple Music Membership on Android
On Android the cancellation method depends on whether you billed Apple Music via Google Play or directly through Apple. If the purchase was handled by Google Play, cancel there. If billed by Apple, cancel in the Apple Music app or at music.apple.com.
1. In the Apple Music app on your Android phone, tap the menu icon at the upper-left corner.
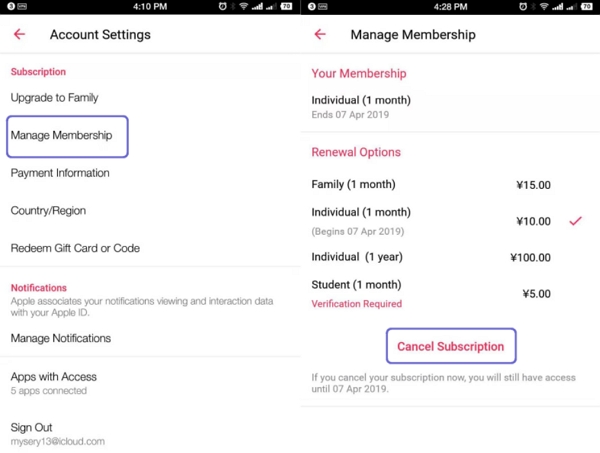
2. Tap your photo or name at the top of the menu to get to your account settings.
3. Tap Manage Membership. If prompted, enter your Apple ID password.
4. Tap Subscription.
5. Turn off Automatic Renewal. If you're prompted to confirm that you want to turn it off, tap Turn Off. When Automatic Renewal is off, paid Apple Music memberships automatically stop at the end of the current billing cycle and free trial memberships end when the free trial period expires.
Part 2. What happens after Canceling Apple Music?
When you cancel Apple Music you will not lose access immediately. Your subscription remains active until the end of the current billing or trial period, giving you time to export anything important. After the subscription expires, Apple restricts access to the streaming catalog and cloud features tied to Apple Music. Below are the consequences listed one by one so you know exactly what to expect and what to do next.
1. You keep access until the billing period ends.
2. You will no longer be able to stream Apple Music catalog tracks, albums, or stations.
3. Songs you downloaded from Apple Music are protected by DRM and become unplayable.
4. Sync Library functionality is disabled when your subscription ends, so cloud-only items and changes made on other devices will no longer sync to your device.
5. Playlists you created that contain Apple Music catalog tracks will still exist, but tracks that require an active subscription will not play.
6. Offline playlists and downloads may be removed by the system.
7. Family plan access is revoked for members.
8. You cannot stream on other devices via Apple Music.
Part 3. How to Keep Your Playlists After You Cancel Apple Music?
If you plan to cancel Apple Music but do not want to lose playlist structure, album metadata, or artwork, exporting your library first is wise. Converting Apple Music tracks to standard audio files preserves playlists, metadata, and album art so you can keep listening after your subscription ends. TuneMobie Apple Music Converter uses the built-in Apple Music web player to access your library and convert songs, playlists, and albums into MP3, FLAC, or other formats. This ensures you retain your organization, artwork, and ID3 tags after canceling Apple Music.
- Convert Apple Music songs to MP3, M4A, WAV, FLAC, etc. you can keep after Apple Music subscription ends
- Preserve ID tags like title, album, artist, artwork, genre, disk number, etc. in output MP3 or M4A
- Convert a bunch of Apple Music songs without downloading them to iTunes library (only on Windows & macOS 10.13 or higher)
- Support 16X faster conversion speed to save your precious time
- Provide flexible audio quality settings to get lossless output files or lower audio quality to save space
- Automatically rename and organize output file names and folders by specifying rules
- Support latest Windows 10, Catalina and iTunes without any compatible problem
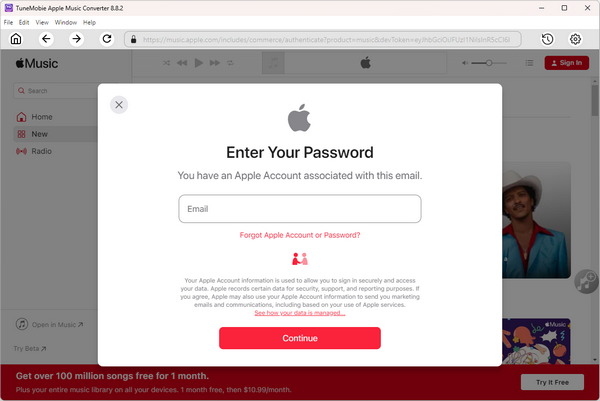
Step 1. Launch TuneMobie Apple Music Converter and sign in to the built-in Apple Music web player by clicking Sign In in the upper right. Once signed in, your Apple Music library and playlists will appear in the left panel for easy access.
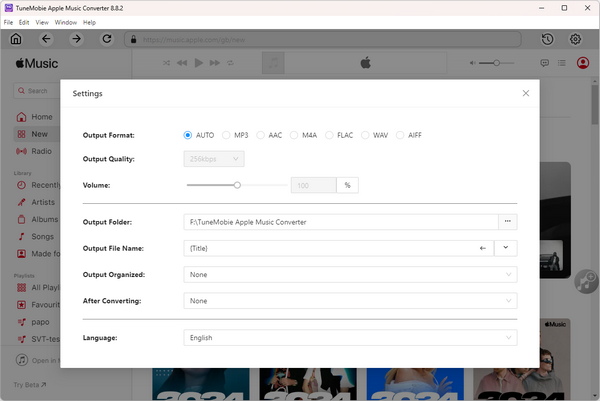
Step 2. Open Settings and choose an output format such as FLAC, MP3, or M4A. Pick your preferred bitrate (up to 320 kbps when available), set the destination folder, and configure file renaming and sorting rules.
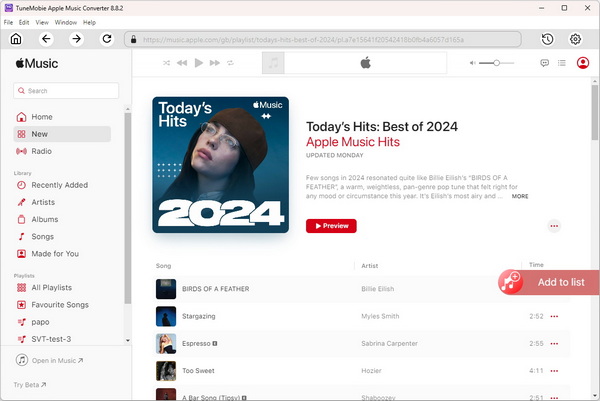
Step 3. Use the built-in player to navigate to an album or playlist and open its detail page to display the track list. Click Add to list (center/right) to add the entire album or playlist to the conversion queue, or select individual tracks you want to convert.
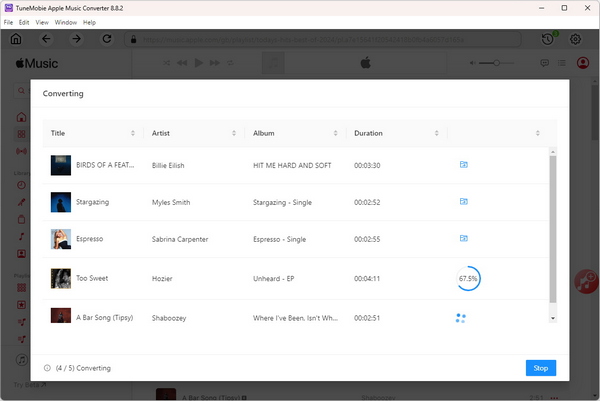
Step 4. All tracks are selected by default. Uncheck any tracks you do not want to include, then click Convert. The converter will capture the audio stream and ID3 metadata, then export the files (MP3, M4A, FLAC, or the chosen format) to your selected output folder.
TuneMobie Apple Music Converter is very easy to use and integrates iTunes music library with software interface. However, if you want to know how to convert Apple Music songs to MP3 or M4A, click the tutorial links below to learn the details.