- Part 1: Use Windows 10 Photos to Create and Edit A New Video
- Part 2: TuneMobie Apple Music Converter: The Solution to Add Apple Music to Photos
- Part 3: Convert Apple Music to MP3/M4A in A Few Clicks
- Part 4: Add Converted Apple Music Songs to Windows 10 Photos
Use Windows 10 Photos to Create and Edit A New Video
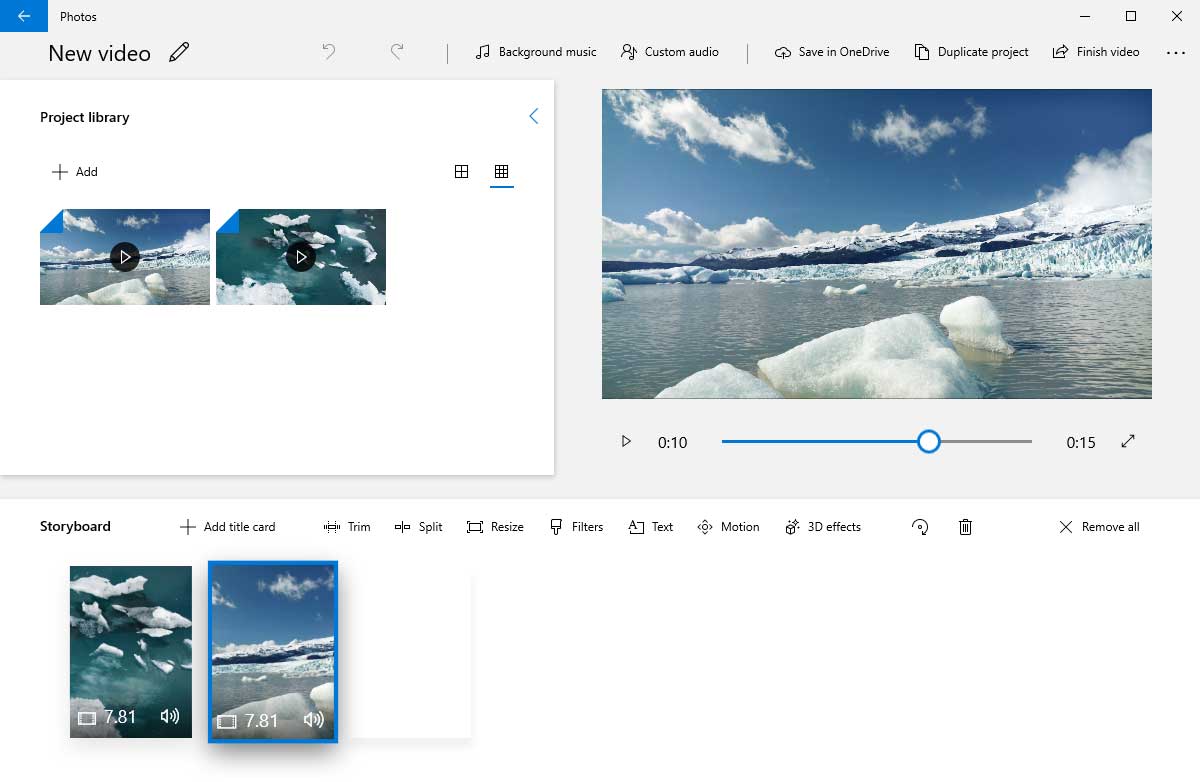
First of all, search and open "Photos" or "Video Editor" through Start Menu or you can also right click the video file, click "Open with" and choose "Photos". Then you will see a few tabs at the top, click "Video projects" to open the video projects interface, where you can create a new video project or edit existed video projects.
After creating a new video project, you are able to add videos from your PC or your collection to the project library on the left, and then you can drag and drop them into the storyboard below.
In the storyboard, many cool functions are provided for you to edit your video. You are able to trim, split or resize your video easily, and other functions like adding filters, adding texts, adding motions and 3D effects are directly listed in the storyboard. You can also click the "Background music" or "Custom audio" button at the top of the interface to make an interesting edit.
Add Texts
You can add texts by clicking the "Text" button. On the right side of the text adding interface, you can enter the texts you want to add, select the animated style of the texts, and choose the layout to decide where you want the texts to be placed in the video.
Add 3D Effects
Click the button "3D effects" and you will see your video on the left, a timeline below and three tabs with its own panels on the right. Choose a 3D effect from effects panel or add some from the 3D library. Moving slider on the timeline decides when the 3D effect appears. And moving the two blue buttons on the timeline decides the starting point and end point of the 3D effect. The edit panel allows you to edit the 3D effects that you have chosen for the video. Once you finish your operations, click "Done" to save them.
Add Background Music in Your Video
To add background music into the video, all you have to do is to click "Background music" or "Custom audios" at the top. Clicking the "Background music" button allows you to add some built-in music to the video, but you can only click "Custom audio" button to import your own audio tracks and control the length and starting point of it.
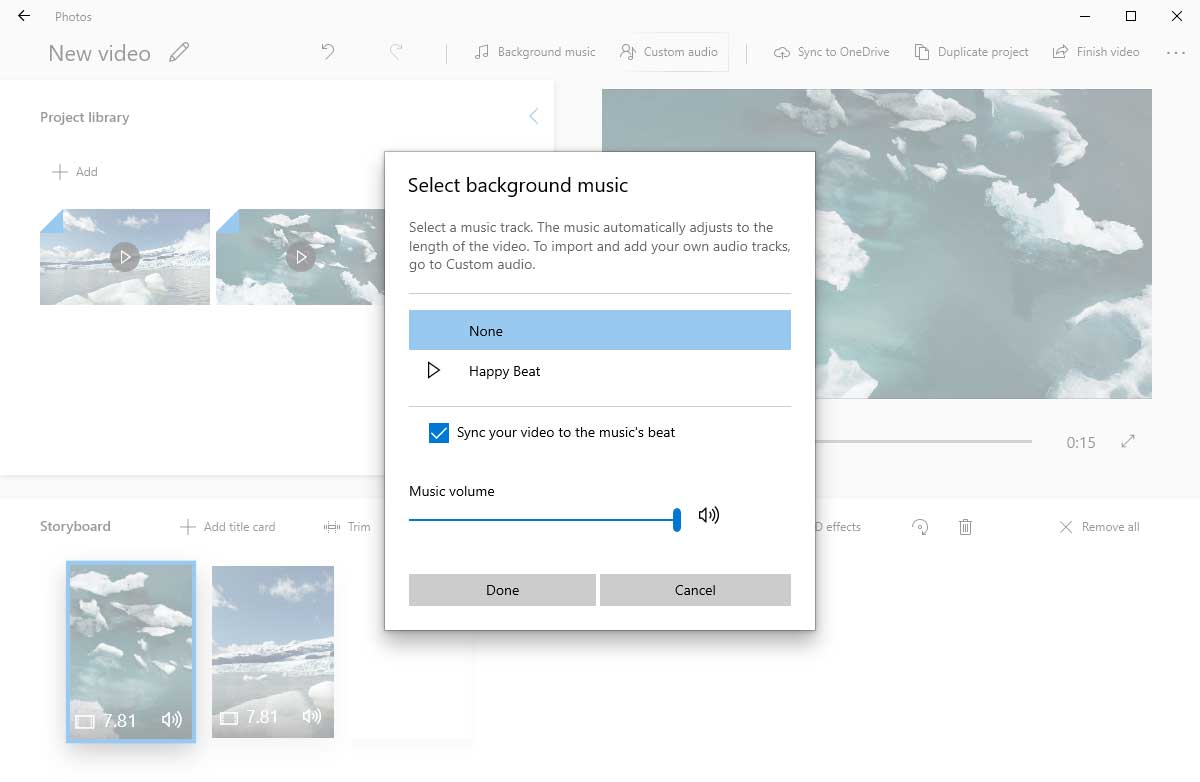
If you want to make your video more attractive, you may need to add an appropriate background music to it. The audio file formats that can be used with Photos are AAC, ADTS, MP3, M4A, WAV, WMA. But unfortunately, Apple Music songs are encrypted M4P files and therefore they cannot be used before conversion.
Such a pity, isn't it? Don't worry, TuneMobie Apple Music Converter can help you with this problem perfectly.
TuneMobie Apple Music Converter: The Solution to Add Apple Music to Photos
Converting Apple Music to Photos' video project supported audio formats like MP3, M4A or WAV is the best solution to solve this problem, and TuneMobie Apple Music Converter is definitely your perfect choice. Here are the reasons of why TuneMobie Apple Music Converter is the best choice.

- Convert Apple Music songs to MP3, M4A, WAV, etc. which are compatible with Photos
- Convert Apple Music with a built-in Apple Music web player without iTunes or Music app
- Convert Apple Music songs to AIFF, FLAC when necessary
- Keep ID3 tags like title, album, artist, track number and artwork
- Rename output files in bulk by title, album, artist, track number, hyphen, space, etc.
- Sort output files into folders by album, artist, album/artist or artist/ablum
- Losslessly convert 256kbps Apple Music AAC file to 320kbps MP3 or 256kbps M4A
- Enjoy incredible 20X faster conversion speed on both Windows and macOS
- Fully compatible with latest Windows and macOS (Intel & Apple silicon)
If you are using Windows 10 Photos to make a simple video, and want to add Apple Music songs to Photos as background music, please download Apple Music Converter to have a try first.
Convert Apple Music to MP3/M4A in A Few Clicks
Apple Music Converter comes with an easy-to-use interface, a built-in Apple Music web player, fast conversion speed and flexible output settings. It can help you convert Apple Music songs to MP3, M4A, WAV, etc. in only a few clicks.
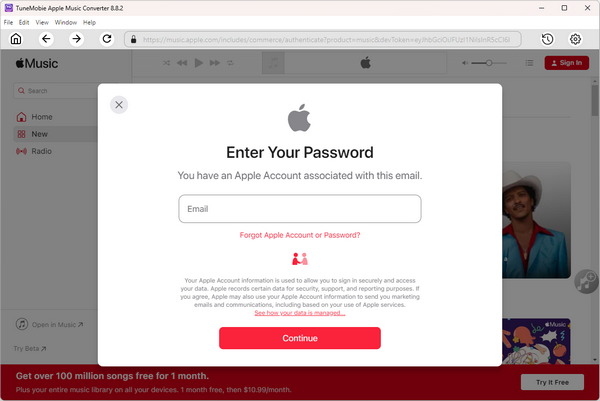
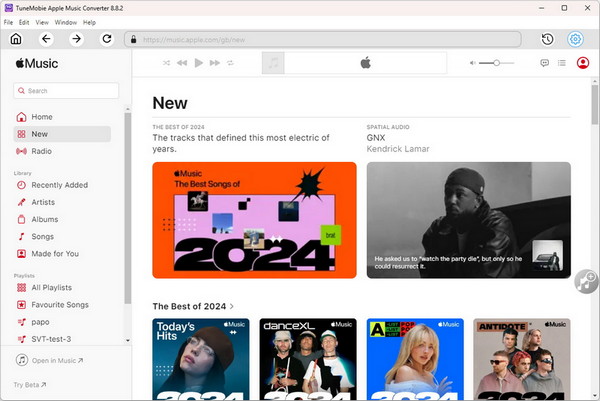
Step 1: Launch TuneMobie Apple Music Converter and Sign in
Launch TuneMobie Apple Music Converter and you will see a built-in Apple Music web player. Click "Sign In" button at the upper right to sign in the Apple Music web player. You don't need to enter Apple ID and password next time if you don't sign out. After signing in, all Apple Music playlists in your library will be displayed in the left panel.
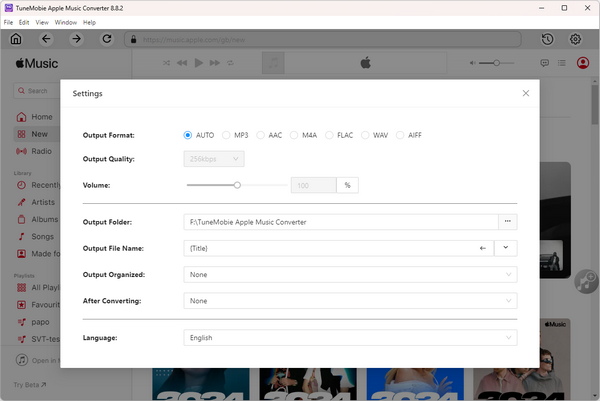
Step 2: Choose Output Format
The default output format is AUTO option, which is 256kbps M4A. Apple Music Converter also provides MP3, M4A, WAV, AIFF and FLAC as output formats. If necessary, you can click Settings icon at the upper right to open Settings dialog, then change output format, output folder, the way of renaming and sorting output files, action after conversion, etc.
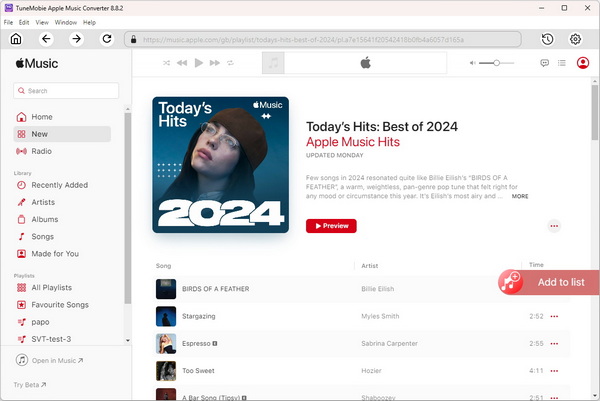
Step 3: Open Apple Music Album/Playlist
Go back to the built-in Apple Music web player and browse your favorite album or playlist, then open the detailed page of an album or a playlist and song list will be displayed.
Step 4: Add Album/Playlist to Conversion List
You can easily find a button in the center right, move your mouse to the button and it will be changed to "Add to list" button. Click "Add to list" button to add all the songs in the album/playlist to conversion list.
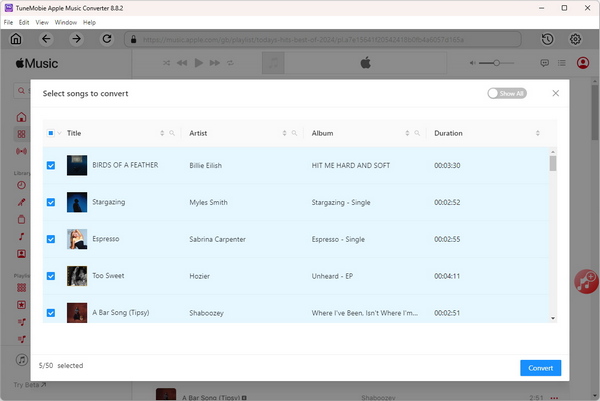
Step 5: Choose the Songs
All the songs will be checked by default. If you don't want to convert some of the songs, you can simply uncheck them.
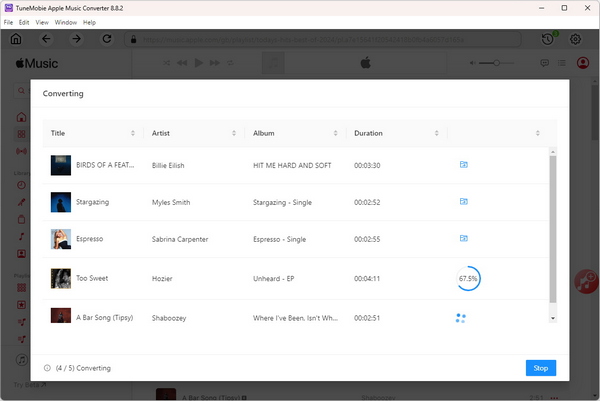
Step 6: Start Apple Music Conversion
Now simply click the Convert button to start converting Apple Music songs to specific audio format which can be added to Windows 10 Photos.
Add Converted Apple Music Songs to Windows 10 Photos
After the Apple Music songs have been converted to MP3, M4A or WAV which are supported by Windows 10 Photos, you can follow the steps below to add them to Windows 10 Photos as background music.
Step 1: Add Converted Music to Video
Click "Custom audio" at the top and you will find "Add audio file" button on the right top corner and choose the Apple Music tracks you just converted from the output folder you set.
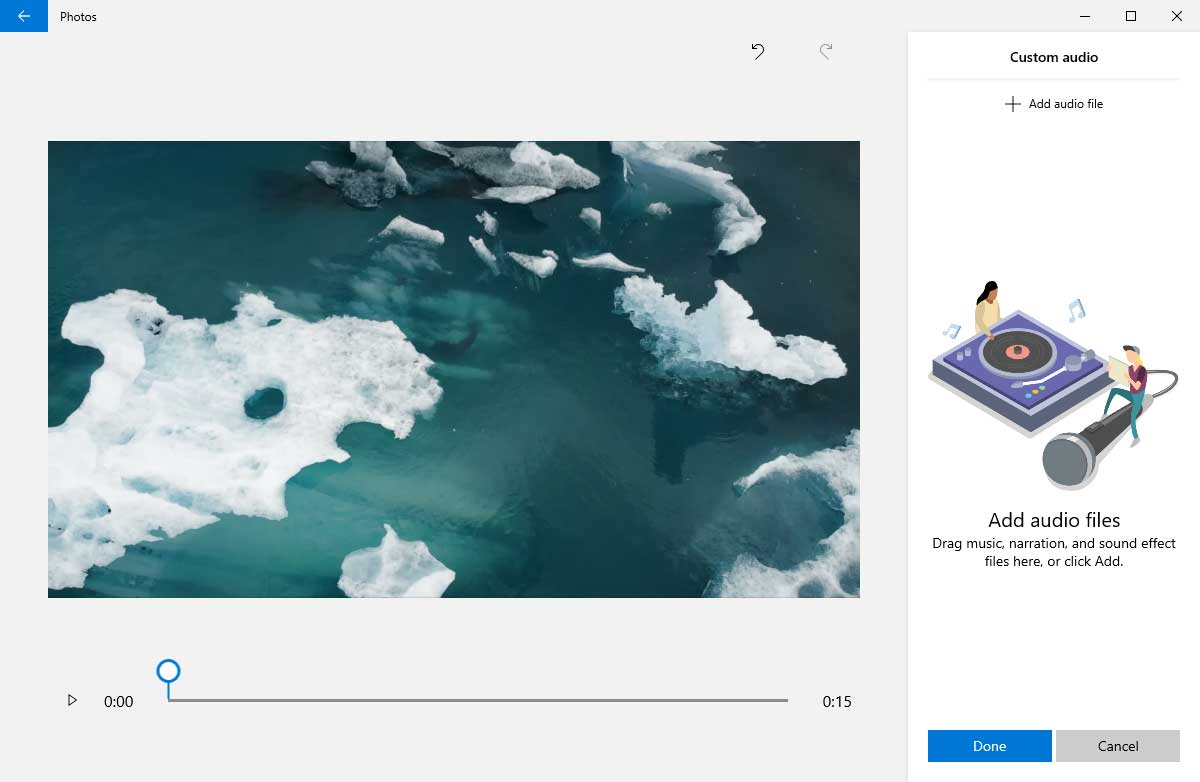
Step 2: Set Start Point and End Point of Background Music
Move the slider to control when to start the music and when to end it, and you can also click the button on the right to adjust the volume. When you finished editing, click "Done" to save your edits.
Step 3: Save Your Video
Find and click the button "Finish video" on the top right corner and select a file size. Photos provide three file sizes for users which are "S", "M" and "L", you can choose the size according to your needs.
Converting Apple Music songs allows you to liberate from the various limitations mentioned in the article. With TuneMobie Apple Music Converter, breaking the usage limitations of Apple Music songs become simple and fast.
Bottom line
You can now use Apple Music songs as Windows 10 Photos' background music, and if you want to add background music in a video which you are editing on other video editing software programs like Adobe Premiere and PowerDirector, TuneMobie Apple Music Converter is also helpful and useful.