- Part 1: Why Apple Music Songs Can't Be Added to Final Cut Pro X Directly?
- Part 2: How to Convert and Import Apple Music to Final Cut Pro
Part 1: Why Apple Music Songs Can't Be Added to Final Cut Pro X Directly?
"Can I use Apple Music in Final Cut Pro?" or "What music can I use in Final Cut Pro?". You can import music and sound from your Music library into Final Cut Pro but if your Music library includes protected files, they are unavailable. Unluckily, Apple Music songs are exactly the protected files.
Apple Music songs cannot be added directly to Final Cut Pro because they are protected by DRM (Digital Rights Management). This protection prevents unauthorized copying or usage, which means even if you download Apple Music tracks for offline listening, they are not in standard MP3, WAV, or M4A formats supported by Final Cut Pro.
Part 2. How to Convert and Import Apple Music to Final Cut Pro?
TuneMobie Apple Music Converter is designed to convert Apple Music songs in your music library with a built-in Apple Music web player. It can easily convert Apple Music songs to all-purpose audio formats like MP3, M4A, WAV, etc. with ID3 tags retained. After conversion, you can add the songs to iTunes or Music app, and the songs will be displayed in Final Cut Pro as well, which means you can add the converted Apple Music songs to Final Cut Pro video editing project.

- Convert Apple Music songs to MP3, M4A, WAV or AIFF which is compatible with Final Cut Pro
- Convert with a built-in Apple Music web player without using iTunes or Music app
- Preserve ID3 tags like title, album, artist, track number and artwork after conversion
- Rename output files in bulk by title, album, artist, track number, hyphen, space, etc.
- Sort output files into folders by album, artist, album/artist or artist/album
- Losslessly convert 256kbps Apple Music AAC file to 320kbps MP3 or 256kbps M4A
- Enjoy incredible 20X faster conversion speed on both Windows and macOS
- Fully compatible with latest Windows and macOS (Intel & Apple silicon)
Easy Steps to Convert Apple Music Songs to MP3/M4A/WAV
TuneMobie Apple Music Converter is very intuitive and easy-to-use. You can easily convert Apple Music songs to MP3, M4A or WAV in only a few clicks. Please check the user guide below for your reference.
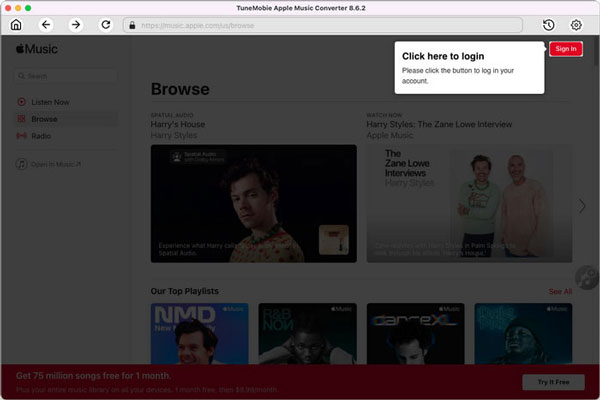
Step 1: Launch TuneMobie Apple Music Converter and Sign in Apple ID
Launch TuneMobie Apple Music Converter and click "Sign In" button at the upper right, enter your Apple ID and password to sign in built-in Apple Music web player. You don't need to sign in again if you don't sign out the web player.
Step 2: Adjust Output Settings
TuneMobie Apple Music Converter provides MP3, M4A, WAV, AIFF, FLAC and AUTO option as output format. As Final Cut Pro supports MP3, M4A, AIFF and WAV formats, you can choose any output option except for FLAC.
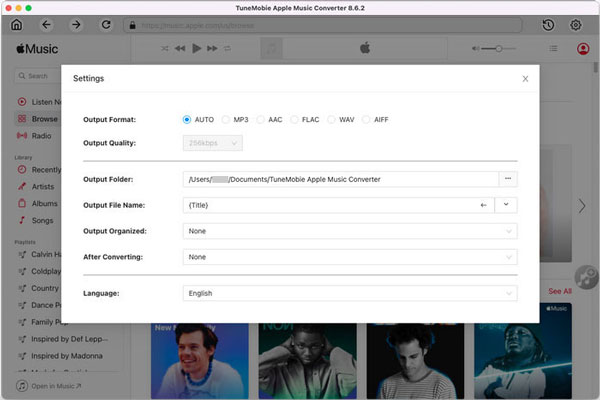
In Settings dialog, you can change output folder, select how to rename and sort the output files. For MP3 and M4A output formats, you can also adjust audio bitrate.
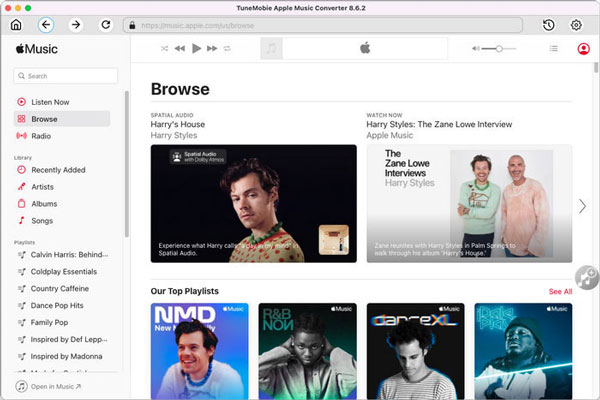
Step 3: Open Apple Music Album/Playlist
Go back to the built-in Apple Music web player and browse your favorite album or playlist, then open the detailed page of an album or a playlist and song list will be displayed.
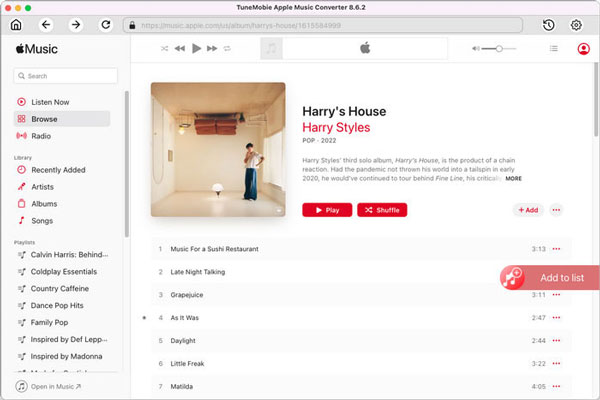
Step 4: Add Album/Playlist to Conversion List
You can easily find a button in the center right, move your mouse to the button and it will be changed to "Add to list" button. Click "Add to list" button to add all the songs in the album/playlist to conversion list.
Step 5: Choose the Songs
All the songs will be checked by default. If there are any songs you don't want to convert, simply uncheck the songs.
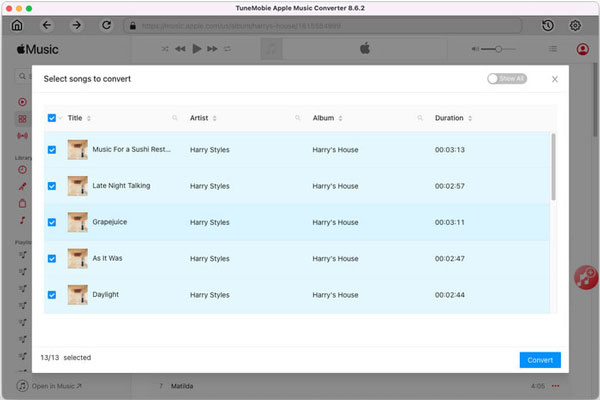
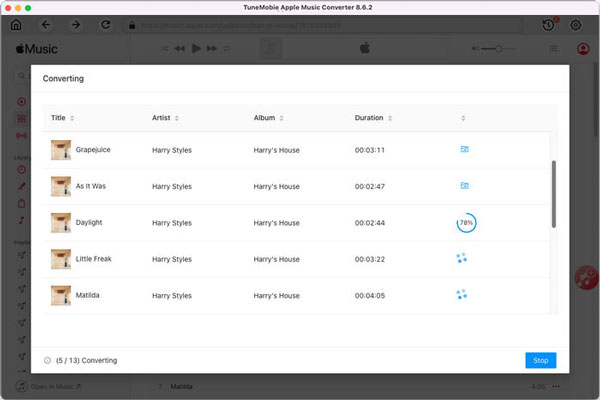
Step 6: Start Apple Music Conversion
Now simply click the Convert button to start converting Apple Music songs to specific audio format which can be used in Final Cut Pro.
Add Converted Apple Music Songs to Final Cut Pro
After converting Apple Music songs to MP3/M4A/WAV, you can use them in Final Cut Pro video project by following steps.
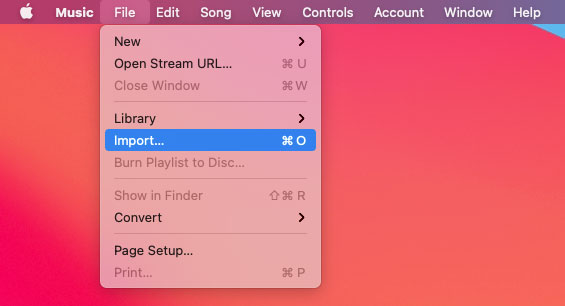
Step 1: Add output songs to iTunes or Music app
To add converted Apple Music songs to Final Cut Pro X, you need to add the songs to iTunes library or Music app first. If you are using macOS Mojave 10.14 or below, open iTunes and click menu "File" > "Add Files to Library" and browse the output folder of Apple Music Converter, add the output songs to iTunes library. If you are using macOS Catalina 10.15 or later, open Music app and click menu "File" > "Import" to add converted Apple Music songs from the output folder.
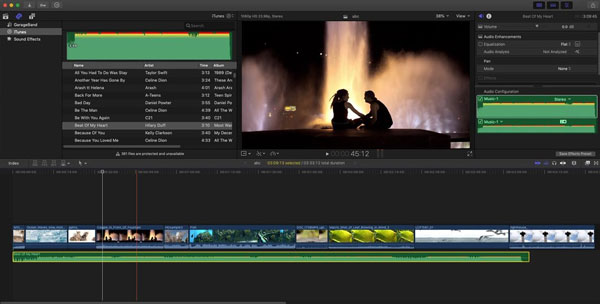
Step 2: Open Music section in Final Cut Pro
In Final Cut Pro, click the Audio button in the top-left corner of the Final Cut Pro window and you will see GarageBand, Music (iTunes in older macOS) and Sound Effects. Then click Music or iTunes in the sidebar. As the converted Apple Music songs have been added to Music app or iTunes, you should be able to find them in the song list.

At the bottom of the song list you can still find the warning message "xxx files are unplayable and unavailable" if you haven't deleted the original downloaded Apple Music songs, but it's OK as their converted version can be found in the list.
Step 3: Drag songs to timeline
You can use the controls at the upper-right corner of the browser to find the music or sound you want. You can search for an item, choose which items to display, preview an item or select more than one item. When you are ready, you can drag a song or multiple songs to timeline as background.
For better import and playback performance, Final Cut Pro automatically transcodes all MP3 audio files to MOV audio files and retains the original MP3 files for future use.
Step 4: Edit & publish the video
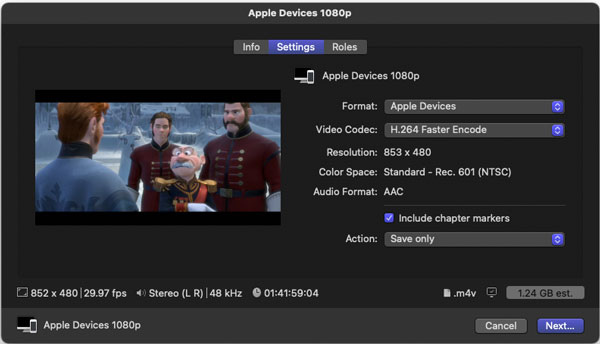
Now you can go on editing your video project. Once you finish video editing, you can click the Share button at the upper right to choose output format. You can save the video in your local disk or upload to YouTube website.
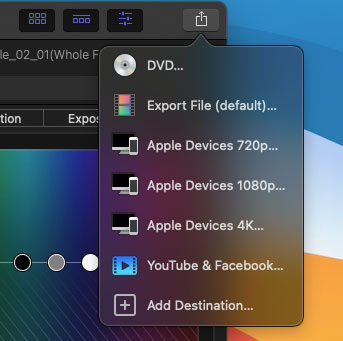
You can change the creator, output format, voice codec, resolution, etc. in the output settings. After settings, simply click Next... to go to save the output video. In this way, you can use Apple Music songs in your masterpiece of video editing.
Bottom line
Final Cut Pro X is a powerful Mac video editor that is satisfactory for all video editing enthusiasts or professional video editors. With the help of Apple Music Converter, Final Cut Pro X is even more powerful and more suitable for beginners. If you haven't started using Final Cut Pro X yet, try it out now and don't forget that TuneMobie Apple Music Converter can help you take it to the next level in video editing.